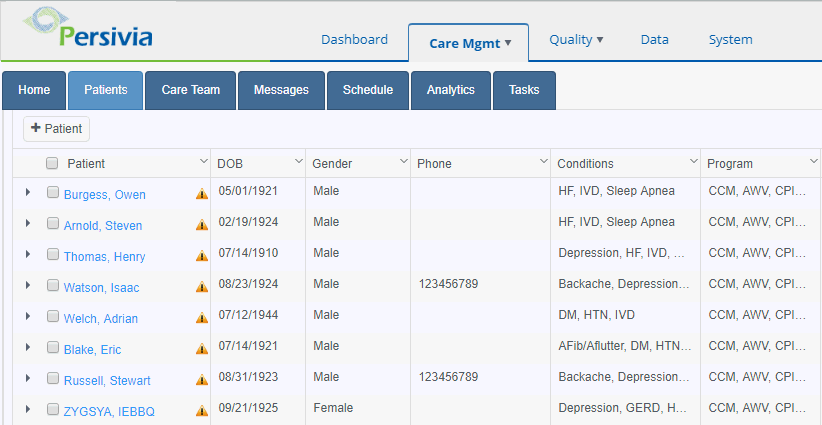
The Persivia portal uses tabs, lists, filters, page tabs, and function buttons to enable you to quickly navigate around the system and perform all of your job-related tasks as easily as possible.
The top tab bar allows you to quickly navigate from one part of the
system to another. When you click a tab after logging in, you gain access
to all of the functions for that tab. For example, when you click Care
Management, a list of available functions related to Care Management appears,
and you can then navigate to the functionas available such as Patients
and Care team.

During a given login session, the system keeps track of where you were on a given tab. This means that if you move to another area of the system (by clicking another tab), then return to the original tab where you were working, you are returned to the page you were on when you left that tab. This enables you to move around to different areas of the system as needed without losing track of what you were doing on a given tab.
In most cases, when you click a tab in the tab bar, a list of items appears. For example, when you click the Patients tab for the first time during a given login session, a list of all available patients appears.

Some lists that include a large number of records display a pre-defined number of records or items at a time (for example, 20 records are displayed per page). If the list contains more than 10 items, you can use the Next and Prev arrow buttons at the bottom of the list to navigate to different parts of the list. The number of pages in the list is also displayed at the bottom of the list.

On the right side you will see the number of records shown on the current page along with the total of records. A refresh button allows you to refresh the patient list.

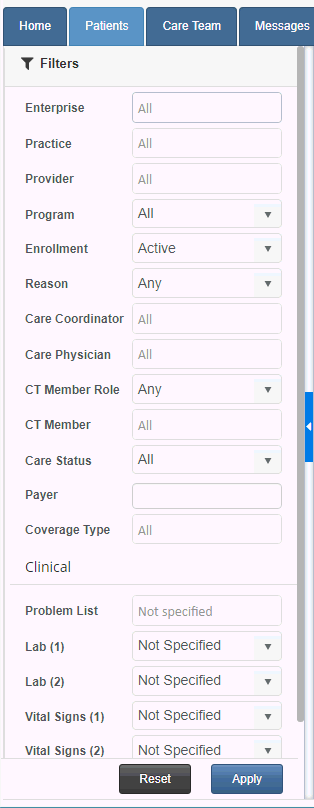
The portal provides various means of filtering data displayed on the pages.
In this example, the filtering pane allows you to specify the types of patient profiles that you want to work with during your current session.

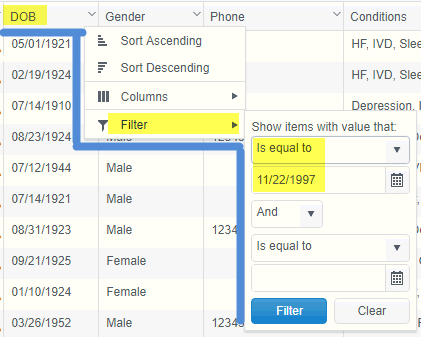
When working on a list, you may filter data further by applying filters for every column displayed on the list. The example below shows how to set up a filter for the patient Date of Birth.

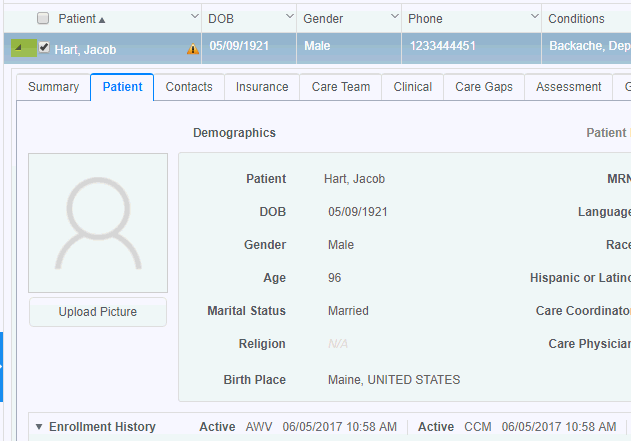
Whenever you want to view detailed information about an item or record, a patient record in this case, you can:

The in-place patient details tabs are shown below:

Depending on your location in the system, various function buttons will be displayed to enable you to perform the functions that are associated with your current location in the system. For example, when you are working on a patient or list of patients, a number of function buttons are available to you.

On logging in, you will see a summary workflow that places you in a central position convenient for most management actions. However, the features of the workflow differ with the user type that you have been assigned, as described in the next section.